 Well, you can tell its been a while since I've posted! I went to add photos first before writing anything and ended up posting them with no comments! Wow!!! I guess its been more than a little while!
Well, the above photo shows how much snow we had about 2 1/2 to 3 weeks ago so my excuse for not posting here is that perhaps I have been in a very deep depression over the humungous amount of snow we have received this winter!!! We had over 6 to 8 feet in the backyard! Please take note of the tree branch in the above photo that is directly to the right of my husband Kevin and our dog Skyler. There is about 5 feet or more of snow on the ground right there!
Here is a photo of that same area taken about 30 minutes ago, on Mar. 20. Still alot of snow, but at least there is some bare ground showing and there is an end in sight to this horrible snowy winter!
 I have been doing alot of stitching and of course have no photos of any of it. I am currently working on Quaker Diamonds by Rosewood Manor. One thing I did that excites me to no end is, I enrolled in my very first online course with Sharon B and what a wonderful thing to do! The course is called "Studio Journals" and it is amazing! I am a few weeks behind as a family emergency came up that called me away for quite a few weeks but I have jumped in today and am ready to roll!!!
I have never ever done a journal or scrapbooking or anything similar in my life. I found out about a certain book about 15 years ago that dealt with painting and decorating journal pages and was excited enough to search for years to find that book. Then along came Sharon B's website. I am totally in awe of her stitching and the information she provides on her web site. I consider her samples to be works of art!
I have been in art stores over the years and I'm sure I have a life time supply of journals in various sizes and forms lying around but have always been a bit leary of jumping in to use any of them, thinking that when I got "good enough" to put something into a journal, I would. But, reading Sharon's class notes I discovered that if I never start a journal, I will never learn, I won't get to where I want to go. My ideas will stay jumbled in my head with no where to go and no way to get to where I want them to go.
I love nature and trees and I love taking photographs. To attest to that, I have 2 - 500 gig hard drives on which I store and backup my photographs, so yes, I love taking photographs.
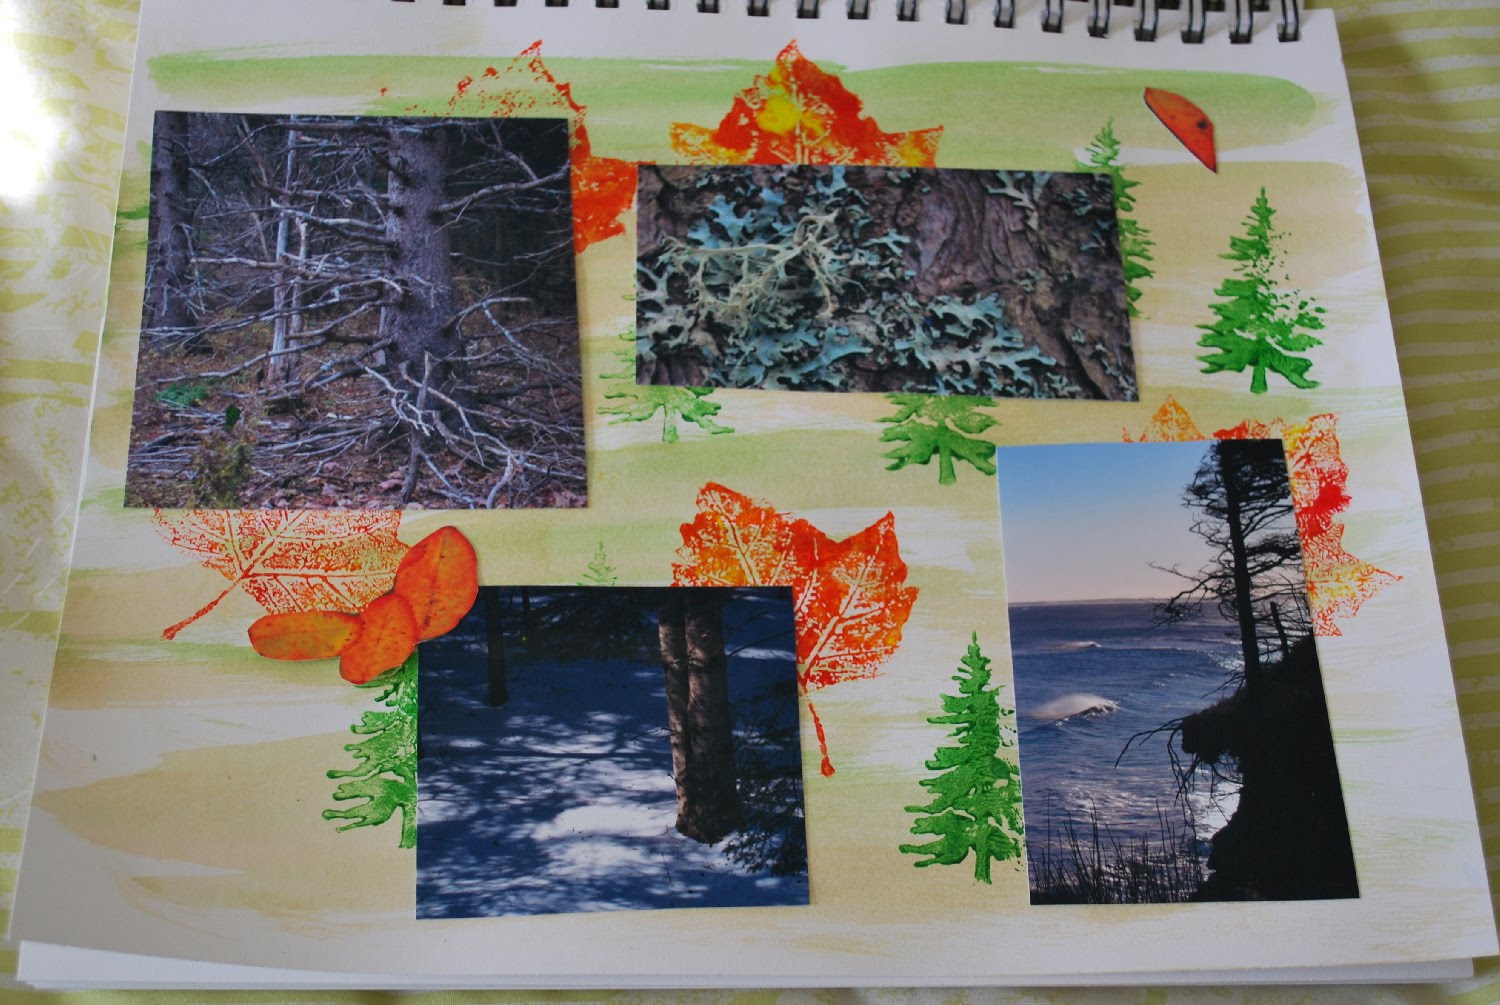
Anyways, this is the introductory page to my very first journal ever! I have a dream to take my photographs further and do art quilts with them, or wall hangings, or something. I just feel there is something in me that needs to do something with what I see in my photographs. The sunrise is the light shining on a new adventure, art journalling!

I can very easily get caught up in the details and so when I printed off my "I have a dream" saying for the first page, I carefully took my scissors and cut out the word "DREAM". I then thought to myself that "enough of this crap", and ripped the rest of the words out. I had alot of fun doing my first few pages!
I have always loved trees and taking photographs of trees. As well, I love the play of light and dark, especially in the winter when the shadows are that wonderful shade of blue. So, the very first photos I chose for my art journal are of trees and nature and the play of shadow and light. These are what I think about when I think of making an art quilt and so I needed to get them into the journal. I will do the exercises in the class notes from Sharon though, to make sure I learn everything I need to to get to where I want to be!


Well, thank you for reading and joining me on my new adventure!

Well, thank you for reading and joining me on my new adventure!

 In making the biscornu, I got a brilliant idea on how I might make my next eyeglass case! I will join the outside together like I put a biscornu together! I will backstitch over 2 threads along my outside border and then join the front and back together by slipping my needle into the backstitches. There is a picture somewhere down below on how I did this, but there are absolutely tons of great videos and posts already on the net on how to make biscornus, so I dont' need to spend too much time on doing it again.

 I then chose a bright yellow cotton for the inside of the case, cut two rectangles larger than my eyeglass case and put the right side of the yellow fabric to the right side of the white front of the case. I sewed the cotton to the eyeglass case front along the line that will become the top or opening of the eyeglass case. I have a photo here of the right sides being placed together.

 I then put the front and back of the eyeglass case together, right sides together, which means that the two sides of the inside yellow cotton are now right sides together. I sew the yellow section together in a rectangle shape so that it is slightly smaller than the eyeglass case. (of course I measure the eyeglass case and draw out a sewing line on my yellow fabric which forms my sewing line. I trimmed the edges after sewing and zigzagged stitched to make sure it didn't fray.
 I turned my eyeglass case to the outside and you can see that there is a clean seam at the opening of my eyeglass case. The inside of my case is now complete and I no longer have to worry about it.
 I trim the excess fabric away from the white outside of my case, zigzag to prevent fraying, and then begin sewing my front of the eyeglass case to the back, using the same method to put biscornu together. The needle is put under one backstitch from the back of the case and then under one backstitch from the front of the case and then gently pull and go on to the next backstitch.


 The instructions for using these sheets are fairly simple and on the package. Print your photo onto the sheets. Let them dry, peel off that paper backing and then heat set the colour by ironing the sheet with a hot dry iron (no steam).


 I then add the 1 1/2 inch strip of fabric to the sides to completely frame my photo, again trimming to cut off any excess.


 I then took my 2 1/2 inch strip of black fabric and ironed it in half lengthwise so you end up with a folded strip that is 45 inches long by 1 1/4 inches wide. If you have ever put an outside binding on a quilt, you know that when you join the two ends together where they meet, you don't want alot of bulk or fabric so you cut the two ends on an angle so that there is less fabric and thus, less thickness. I start my binding with the angle cut, folded and ironed, to make the finishing easier. I also sew the binding doing mitred corners on my project. I will let you do a google search for demonstrations on how to do a mitred corners on quilts. They might seem difficult to do but if you just go along slowly, they aren't difficult at all and you do get better each time you do one.

 I then take my backing, which in this case is a fall print which I have ALOT of, right side facing OUT or to the back, and then put the quilt batting on top of that, and then put my framed photo that I have just sewn. Again, I sew around the framed photo using a 1/4 inch seam allowance, basically sewing ontop of the line of stitching I just did to sew on my binding.

 Flip the binding out to the outside and around to the back.

 And you have your almost finished piece!!!


 I have never done one of these demonstration blogs before, so have a feeling that I left alot of stuff out but as I said at the beginning, I am assuming that you have some quilting/sewing knowledge and so won't find the instructions too bad. In either case, it is a fun project to do and is a lovely gift or just something different that can be done with photographs.


 This next garden is also "L" shaped and at the west side of the house. Each side is probably 15 + feet or over 4 meters long. I have most of my lilies in this garden as well as some beautiful fuschia coloured peonies, poppies and lupins which will be blooming soon.


