Sunday, July 29, 2012

Lavender on Vacation

Howdy!
Just stopped in to say "hay!". 
Have been busy with my Mom.  She has more spunk and energy than I think I ever did!  I'm having a hard time keeping up to her with her walker even tho she is almost 88 and I am a young but geezerly "almost 59".

A short while ago I saw in a Nova Scotia tour book that there was a lavender farm a couple of hours away from the cottage we usually stay at.  Unfortunately, its just a little too far away.  It is called Seafoam Lavender Farm.  It looks like a wonderful place to spend some time at.

In the meantime, I found out there is a Lavender Farm on PEI.  It is quite charmingly called  "The Five Sisters of Lavender Lane". 

It may not be as large of an operation as the Seafoam Farm, but they have a lovely assortment of Lavender teas, Splashes, linen sprays, scents, sachets, soaps and jelly's and a few other things I can't remember!   Their little store is lovely as you can see:
The farm is situated at the top of the hill and has about 3 or 4 plots of lavender plants.  This is one of the plots.

 And a view of another plot:


My Mom is the one with the walker and the shop is the white building to the right.
Hope you are enjoying your summer as much as I am.... 

Talk to you soon.


Friday, July 20, 2012

Sheep Felting project finished and yard

Howdy!
Well, I am done with my Moy Mackay sheep project.  I am extremely pleased with it. 

I had a heck of a time trying to figure out how to complete it or mount it.  I was originally thinking of just fusing some steam a seam to the back and then ironing on some cotton that I had prepared first to hold a dowel so the piece could be hung easily.  I tried Seam a Seam and I didn't think it would work well because the wool is so fuzzy.  And I was right.  It left holes or air pockets.  I then tried another iron on fusing product and same thing.  I was left with a mess.

I've put the end of a paint brush into the iron on fusible stuff above to show you it isn't attached at all in some places.   So, I had to rip out all the non attached bits and it looked downright horrible after that.

I decided that the only thing that might work is 2 sided carpet tape.  My dear husband was ever so sweet and bought me some that was a good 2 inches wide.  I forgot to take a photo of it but I put the tape all around the outside and then a few smaller strips across the middle to make sure it wouldn't buckle or poof out in the centre. 

I didn't like the foam core board idea and didn't want to frame it in the regular way with matting and a frame so searched around the house and found a canvas prepared for painting.


I grabbed some acrylic paints that were in colours similar to the sky and the grass colours of the felted piece and starting brushing it on.  I found if I tried to paint it smoothly, you could see the brush strokes and so I did sort of a mottled kind of painting.  My husband said he liked the mottled the best so that is what I did.

I then took my felted piece and carefully applied it to the painted canvas trying to make it even on all sides.  I pressed it down all the way around and I can tell you it is as firm as it can be and there is no way it is coming off!  So I love it!

The end product:

Well, probably like most people, I am going to take a bit of a break from blogging.  My Mom is coming next week.  She is almost 88 years old and gets around by herself with her walker or rollator as they are officially called.  She lives on her own in a very large city in Ontario in an apartment and wants to spend some time in our yard.  She is still sharp as a tack but her knees are very bad and she knows her travelling days are numbered so is very much looking forward to her visit here.  We have alot of gardens and plants and trees and bushes and she really enjoys just sitting in the yard.  Always something to look at.

When my husband and I met and I moved in with him over 11 years ago, there was little more on this almost 1 acre plot of land other than a few large sweeping elm trees.  There are now numerous flower gardens, a very large rhubarb patch, a vegetable garden and more than 50 and perhaps as many as 70 or 80 bushes and trees, in addition to the elms.  There are rhododendrums, various lilac bushes, butterfly bushes, smoke trees, blue spruces, regular spruces, crab apple, various plum and apple trees, burning bushes, etc. etc. etc.
I have not been able to get to weeding the final flower bed and still have a wheel barrow of plants that need planting but need to weed the final garden to plant them!

I need to get the house ready for my mom as she does need some physical aids to get around.  When she is here she will need help getting into and out of the house and perhaps moving her walker around on the grass. 
As she relaxes in the yard listening to the birds sing and the wind in the trees, I might get some stitching done, but mostly, we will just enjoy each others company.  When she leaves, I will be preparing for my felting demonstrating at the Fair in Charlottetown mid August and then it is a bit of relaxing after that. 

Some of my gardens.

The L shaped  "under the kitchen window garden".  That black thing in the back is a solar heater.

Front of the house garden.  Some of the trees and bushes can be seen in the background.

Side yard garden.
Back of the above side yard garden.  And yes, there are two kinds of clematis growing against the side of the house.

And the vegetable garden below.

And the "U" shaped garden at the back patio that is in bad need of weeding.
Well, enough for today.
I may pop in again soon if I get a few minutes, otherwise, see you in a few weeks!  Enjoy your summer!

Happy stitching!


Tuesday, July 17, 2012

Moy Mackay felt piece still not finished, okay, maybe now

Hello!
It's hot!   I guess it's hot just about everywhere!  Wow!  And I think I need to add that it's also DRY!  And that is probably the worse thing.  Wow, do we need rain!

Well, last week, we had this wonderfully coolish day with the most wonderfully strong wind blowing through the house, and I had a brain fart.  I have now learned.  Never listen to brain farts! 

My brain fart told me it would be a great time to paint the bathroom.  Well, I finished yesterday.  I had to patch little things here and there with Polyfiller, and you have to wait for that to dry, and then sand it, clean it and apply a sealer and wait for that to dry and then two coats of paints and wait for that to dry and then caulk it all.   OMG but that one glorious day of coolish weather with strong lovely winds lasted a whole ONE day!  Which meant that most of the work I was doing was in temperatures close to 30 C with humidex above 30 C.  I sweat buckets!  Good reason to go for ice cream afterwards tho!

It really is weird though because in painting and stuff, I got time to think and I kept going into the room where I had the Moy Mackay felted piece and I didn't think it looked finished so I found some time to look through Moy's book again.  It inspired me to go back to the piece when I had a few minutes and add some sitching and it has made a world of difference.

Anyways, it looked fine to me until I just photographed it a few minutes ago out in the yard.  Good idea to do that as I found there is a line of stitching sort of in the middle of the piece just below the sheep and it just doesn't seem to make sense of the contour of the land so I will take it out and redo it.

In any case, this is what it has evolved to.

I have also decided to change the name to "Sheep in the Sun" as I didn't think that what I did to it came close to looking like it was in moonlight.   I am really super big time having a problem though in knowing how to finish it.  I don't want to make a bag out of it.  I want to hang it on the wall but do I sew something around the edges?  I was thinking of just applying a thick type of Pellon type thing to it and then ironing on some fabric so the back looks finished and then putting in a hanger of some sort.  I have no idea.  If you know of anything, all suggestion welcome!

I also meant to take a ruler and show you how thick the piece was now.  In my last post, I showed that once I applied all the wool to it, before needle felting, it was about 2 inches thick.  Now that it is felted with my needles, it is down to a little more than half an inch or so.  The worst of it all for me, was trying to do the eyes on the sheep.   I must have tried about 5 or 6 different ways of doing the eyes.  I ended up taking some crochet cotton and just stitching them in.  When I tried to felt anything around the eyes, as Moy did in her felt work, it just didn't look right in mine, so I am lacking in some felting skills for sure.

I thought I better explain why so many felted projects all of a sudden.  On the island, we have a fair mid August called "Old Home Week".  Alot of Islanders who have gone away to work, come back to the island that week to visit family and enjoy the fair.   If you check the schedule for the 12th, I have been asked to do a needle felting demonstration by the Women's Institute who run some of the events at the fair.  We show off to the Public, our needlework, our knitting, crochet work, sewing skills, and cooking skills, gardening skills and art work, all run by the Women's Institute.  Even though I am a beginner at needle felting, they have asked me to do a bit of a demonstration, so I thought I better have some pieces ready to show what can be done with wool and a needle and a bit of thread.

I haven't done any other stitching.  I have just been too hot or too tired.

In the heat though, the grain fields are ripening very quickly.  Also very dry looking.


And the blossoms are blooming on the potato plants.  These blossoms that we drove by had purple flowers on them!  Amazing to see the field of purple!


One of the most amazing things to drive by though, is a field of blooming canola plants!  WOW!!!!


If you have a weak stomach, you may not want to look at the next photo.  I had driven to Orby Head at Cavendish National Park last week and just as I got out of the car with the camera in my hands, an eagle flew by with a Cormorant (a sea bird) in its talons.  Amazing!


I better leave on a positive note.   Flowers from one of my pots at the front of the house.

Well, hubby has put the supper tea on and is heating up the BBQ so I better get a run on.

Enjoy life and see you soon!


Thursday, July 5, 2012

Moy Mackay Wet Felted piece recovered!


Hello!

Well, no TAST news yet!  Everything is blooming and the air is sweet and clean and fresh and wonderful!  And my eyes are blurry and burning and itchy even though I take allergy meds!  YUCK!  So not too much stitching for me!

I've been in the gardens alot and its hard to imagine but we've had gorgeous summer weather, sunny and hot and with humidex around 30C + and it gave me energy to do all sorts of things around the house.  Like clean windows and finish planting my pots on the verandah's, and weed and weed!  I've got tons of gardens and trees that I've planted over the 12 years I've been in this house that have grown to create a forest.  I will take photos of it all, weeded and not weeded, and post them soon.

Right now, it is almost 8 pm Atlantic Time and we've had badly needed rain showers off an on all day.  I wish I could share with you the lovely "just rained" fresh air coming in the windows!

Somewhere in between all the kerfuffle, I decided that I needed to work on that Moy Mackay wet felting tutorial that I tried to do last week.  It failed, not because of the excellent instructions given by Moy in her book that I followed, but because I did not use Merino wool for the entire project, as instructed. 

I needed a few days to think of how I was going to approach fixing up my mistakes and mess.  I decided to take a sheet of pre-felted wool that I bought from Belfast Mills on the island.  It is the 5th photo down on a page where I talked about pre-felted wool. I used a coloured piece since it would be felting over top of it and the various colours would not show through.

The wool base is sitting on a TV tray, so that will give you a rough idea of the size of it. 

The next photo is the back of the piece I tried to wet felt last week and what a mess I was faced with.  This blue and lavender stuff was the wool that was NOT Merino wool that would not wet felt.. 

 As you can see, it was one huge mess!   I pulled out the large bulky chunks or tried to pry them apart to create a more even backing.

This is what the front looked like, but I forgot to take a photo of the front before I did anything to it.  I carefully peeled off the sheep and just put them on top so that I could rearange the wool on the bottom half.
So the top was pretty much another mess, from the photo above, but not as bad as the back.  You could see parts of the lavender underneath portion, and very little of the wool was holding together as very little of it was Merino wool.  That teal/turquoise blue colour that shows up in the grassy area isn't really that blue in real life.  There is something with the camera flash that is turning it that colour. 

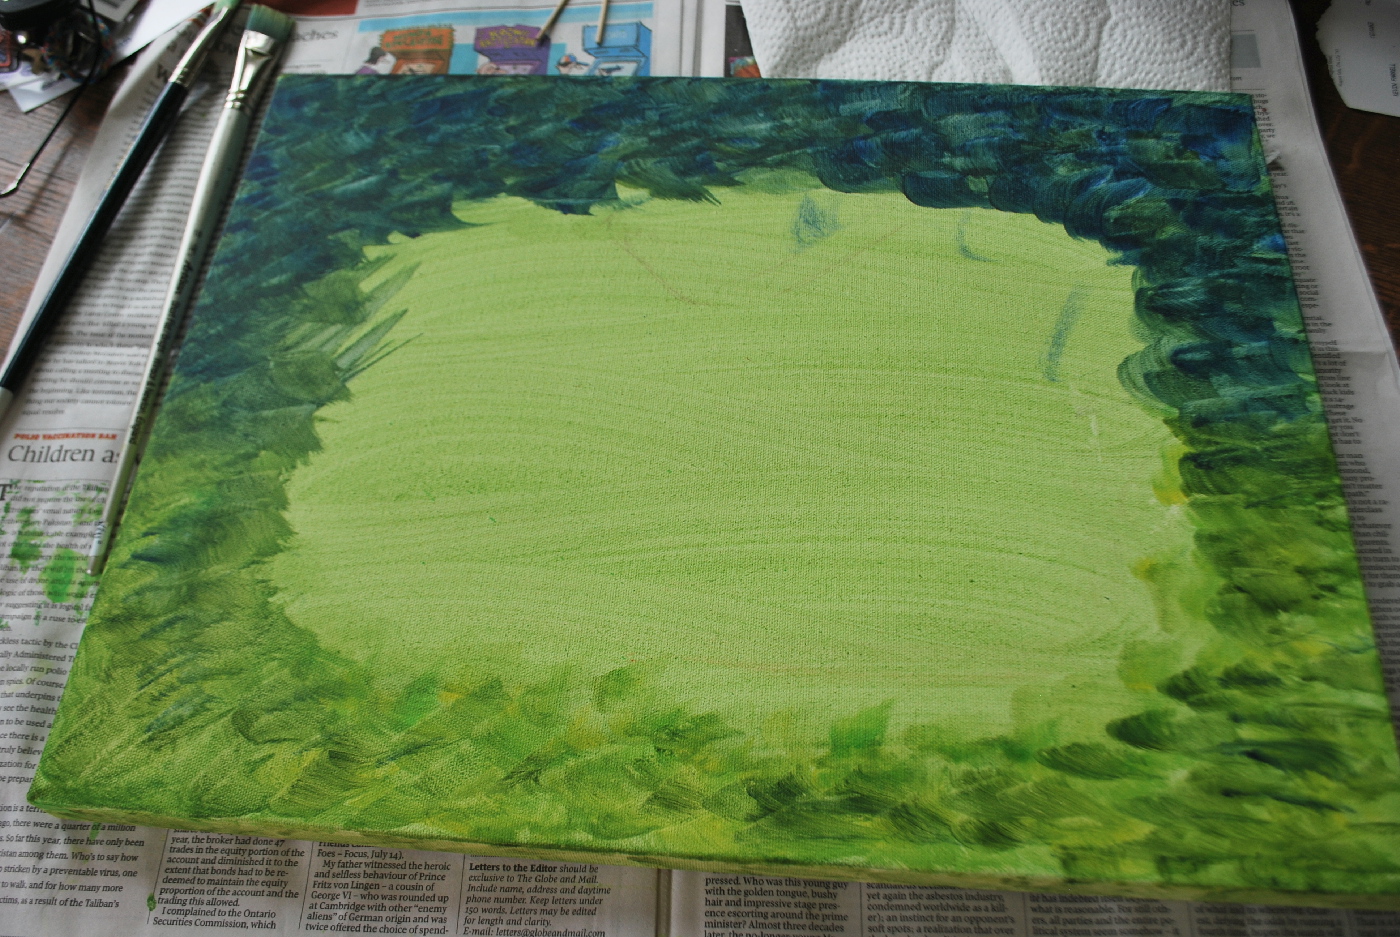
With the sheep and the moon removed, I began laying additional layers of wool, both Merino and otherwise, on top of the dried wet felted wool.  I just kept adding wool fibres until I was happy with what I saw.  The beauty of wool felting is that you can felt the whole piece and if you don't like anything, you can usually carefully peal it off or just add more felt, even when you think you are done!

This is with more wool added, before needle felting.  This is a photo without the camera flash.

This is the same photo with camera flash.

The photo without the flash is probably more real to life.

I kept adding wool and this is what I ended up with.

 The sponge is 2 inches and the wool is about 2 inches thick.You can see that the part I tried to wet felt is a good inch or more thick. 

And I do not have a felting machine, an embellisher, so these were the tools I used to felt the whole thing together. I had to press somewhat firmly to get through all the layers.
The pink thing is a 3 pronged needle felter that I bought at London-Wul and I love it.  It's a tiny bit bigger than a regular sized pen. (This is the most fabulous store ever and a must see if you are nearby!)  The two dark/light green things are Clover needlefelters.  One contains course needles and the other is more of a finer felter.  And if you look behind the right hand Clover felter, you will see a single felting needle.  I would felt with one hand and then switch when I was tired.  I spent probably a few hours felting the entire base. 

When I had the scene complete, I added the sheep and the moon.  As you can see from this next photo, a fair amount of wool was added at times.  I decided I wanted the sheep to be quite fuzzy.
If you look at the sheep to the right of the one I am felting in the above photo, you will see that I slightly felted in the little white nobs into the back of the sheep to give them texture.  After adding the little balls, I took skinny strands of wool and sort of needle felted a tiny portion in between the balls and then looped the wool and felted again, and then looped and so on, to give the sheep some more texture.  You will be able to see it more clearly in the bottom of this post.

I wanted to show you how easy felting was though. 
I thought I would make Moy Mackay's tutorial my own work by adding a barn in the distance, which is NOT in her tutorial.  And this is what it looked like all felted into place.
I hated it.  It really took away from the sheep and the whole scene.  So, I carefully picked at a corner of the barn and peeled it off.
My next issue was putting eyes on the sheep.  I laughed and laughed when I first put the eyes on them.   The sheep looked so evil or they looked as if they were caught in the head lights of a car!
Aren't the two on the left down right scary???!!   What I did was, I took the tiniest piece of black wool and needle felted it across the eyes, so the eyes are visible but no longer the main focus of the piece.  The eyes are a bit more visible in person than below in the photo.

And finally the piece was finished.  It is called "Three Sheep in the Moonlight".

This is the completed piece without a flash.   You see in this photo that the sheep have been made quite fluffy and almost 3 dimensional. And yes, the sheep really do have eyes! 

I didn't want to use a flash so took the piece to a window and tried some natural light.  This is what I ended up with below.

In the tutorial, Moy takes her wet felted piece, which surprisingly looks much better than my piece above, lol, and when dry, she adds quite a bit of sewing machine stitching to it, to define the sheep and make more branches on the trees, etc.  My piece is too thick to try to get it under the sewing machine foot without disturbing the felt.  I might add a bit of hand stitching to it but otherwise, I consider it finished!   Almost.  I still need to iron it to get the needle marks out of the scene.  When pressed, the wool with meld together better and it will become flatter and more natural looking.


Here is a photo taken of our wonderfully loveable member of the family, Skyler, out in the yard.  I probably took this during one of the many times I sat on the front verandah waiting for the hummingbirds to feed at the honey suckle blooming on the post.
And I'm embarrassed to say how much time I spent sitting on the verandah waiting for the hummingbird and it always fed on the side opposite to me!!   This is the best photo I was able to get!

Yes, that fuzzy thing in the middle of the photo is the hummingbird!!

If you have time, you must drop by Pintangle, where Sharon had a great article on Managing Large Projects.  I found the article excellent and very helpful.  I am a great starter of projects but I am easily distracted with new things and have trouble finishing projects.   I have OCD so bad that I spell is CDO as the letters HAVE to be in alphabetical order!  But Sharon has a most wonderful website.  She has a wonderful dictionary of stitches with great photos and diagrams, and her TAST project, (Take A Stitch Tuesday) and now there is something for Wednesday.  No shortage of information available on her site, so take a look!

And Judy Cooper from Newfoundland is travelling and sharing her travels with us.

And the Sunshine Deli is always good for a smile!

Happy stitching!