Tuesday, August 30, 2011

WOW! Its Aug. 30th, my sisters birthday! Hope you have a wonderful day Lash and a great year ahead. You certainly deserve it!

Well, I finished part 1 of the Sumptuous Surfaces course. I feel that I could have added more decorative and raised stitches, but learning the stitches I did use took long enough and I really need to proceed to Part 2 of the course, so left it as is. I used invisible thread to sew on the two shells. Note to self, if I ever get to a craft store, or stitch store (no stitch stores on the island), then I need to get some wooden and glass seed beads as I have very very little of either.

The completed Part 1 piece.


I read the notes on Part 2 and I can't say I was lost, but, I wanted to try something WAYYYYY out there, for me anyways; something way outside my comfort zone. So, I decided first, to apply some paint to my fabric. I had recently purchases two skeins of some very colourful yarn. One was in a sort of orangy, peachy, gold tones, and the other, greens, blues and turquoises. Those are the colours I wanted on my fabric. This was my first attempt at fabric dying.

I had a very limited supply of fabric paint that I had purchased for experimenting and had never used. I had a large supply of acrylic paints, craft quality and didn't know how it was going to react with the stitching fabric but what the heck. Jump in and see what happens.


This is what I ended up with and I have to say that the photo does not do the piece justice. It was horrible!!! LOL It actually looks quite nice in the photo but the centre part just looks like I took a batch of paint and blobbed it down and the colours were starting to get muddy. Honestly, it looks much much nicer in the photo than in person. I did water down the paints, both acrylic and fabric, and wet the sponge, dabbed the sponge from the paint to a piece of paper towelling to make sure the paint wasn't too globby or heavy and then sponged the fabric. I wet the fabric first, put it on a wet piece of paper towelling and then put the whole thing onto plastic. I kept the painted fabric moist for hours and hours before heat setting it with an iron. I actually quit painting the fabric way before I got to this, but the colours were so faint that I kept going back after I put all my paint supplies away, and got them all out again and reapplied the paint. Hence the blob from just way too many applications of paint.


I disliked this one so much, because of the dark blob in the centre, that I found two more pieces of fabric and ended up with these additional two samples.


Again, the photos do not do the fabric pieces justice. The upper piece is quite colourful and I think would be lovely doing a floral motif all over it. That will probably be used for project 3.


In actuality, I thought that the project 3 piece, the upper of the two above pieces, was going to be the fabric that I was going to use for Part 2 of this course. Again, I wanted to do something outside my comfort zone and something I had never done before is to write or add lettering to fabric. I didn't really know how I was going to do this but thought I better start with a stencil. I live in a small town, population 14,000 and no embroidery store, and few of any other type of store. Believe it or not, I was able to find two stencils in town. One was 3 inche lettering and the other 1 inch letters. Well, I wasnt't going to use the stencils for the first time on the piece I wanted to use for Part 2 of the course, so I decided to use the first piece of fabric that I coloured, the piece pictured way up there, which I said ended up with the blob in the centre. I figured it wasn't going to be much use for anything so I will use it for experimentation...

Okay, so I have made the decision that I wanted to write something on my fabric. What to write? This was such a long learning process! Hence Sharon's suggestion to just start writing ideas and see what came up. I finally decided I wanted to write "I AM HERE". Don't ask me why, its just something I needed to do.

Well, it's true what they say on TV.. Happy accidents do happen... WOW!!! I used my 1 inch stencil first and the letters were way too large for the size of piece I was doing. So I took some acrylic paint brushes, watered down some acrylic paints and started hand printing the same words in different colours to see which was best. Well, I ended up liking what I ended up with. Again, the photo does not do the piece justice.
So, the fabric I was going to discard is what I am using for my Part 2 exercise.

I now needed a focal point. Okay, I haven't gotten the whole creative art journal process down yet, but how can I create something in the journal when I have no idea what the possibilities are? My supply of what I will call Mixed Media art supplies is limited and other than travelling about 80 KM to the nearest Michaels Craft Store and paying an arm and a leg for crap, and there are no art or embroidery shops on the island, which means ordering online, which means at least 2 weeks delivery date if it is coming from the U.S., I am stuck using what little I have. And don't hastle me about ordering in Canada. The price difference would buy me a new car!

Anyways, I looked online for ideas and came across something interesting. A Dorset Button. Jump in the car, drive 5 KM into town, buy plastic rings after an hour of searching, come home and end up with this. I am not pleased with it as a centre piece to this design and may keep it in mind for something else. But, another happy accident. I accidentally left a photo in the scanner of the photograph I took of a bird that I had scanned to use for my Part 1 exercise. I love how it made my scan of the Dorset Button jump out. Hmmm wonder where and how I can use that again? LOL


And so the process continues.... I am not using the Dorset Button and have come up with another idea. I stitched it on yesterday afternoon and then decided on the way to bed at midnight last night that I didn't like the colour of perle cotton that I used so ripped it all out. I will try another colour after I get the dishes done, and the house vacuumed and the laundry done... Sigh...

Enjoy your day! Its brilliantly sunny here after a very windy couple of days as Hurricane and Tropical Storm Irene blew through. Looks like sun for a few days. YIPPY!!!!


Thursday, August 25, 2011

Sharon B's Sumptuous Surface Course

Hello!


Summer is almost over and there is a touch of autumn in the air. The sun is shining and there is a bite to the wind..... I'm almost glad for the year to be over as the summer has been horrendously cold and wet tho I shouldn't complain as there is drought and flooding and hurricanes and things in the world.


In any case, I have taken a new course with Sharon B, Sumptuous Surfaces and love it!!! Sharon puts on great classes with wonderful notes and instructions. She has a blog that shows tons of stitches with instructions on how to do them.


This is my first piece which covers the first half of the course. I have to do a bit more work on it to finish it up.


My house is such a mess as I have spent countless hours on the computer printing out pages of stitch instructions or looking up Youtube videos on how to do the various stitches. My first piece probably took me close to 50 hours to complete, if not more.

Sharon says that to complete a 4 in by 6 in piece, which is what mine is, should take about 15 hours or so. That is probably a fair assessment. What took me so long is that I had to learn a few stitches, tried them in my piece, didn't like the floss/thread I was using, or didn't like the look of the stitch or found the stitch hard to do in the floss I was using and then kept ripping them out of my work and redoing them in different thread. Though the first piece took that long, I'm sure the others will be closer to Sharon's estimate of 15 hours.


I absolutely LOVE this kind of work. Any stitching that I had ever worked on previously was always done by following a pattern; ie. this colour and this cross stitch goes in this spot. This is the first time that I ever designed my own piece and then put in the stitch I wanted in the place I wanted, in the colour I wanted. It was quite liberating and exciting!

This is a close up of the left corner of the piece. I have a small seashell to add to the white spot in the lower left corner.


This is the right side and I have a seashell to add over the ferns/seaweed in the right corner.

Thanks for visiting!

See you next time!

Thursday, June 23, 2011

Nothing in particular...

Well, i just about dropped a load when i realized it has been 3 months since i posted last... Spring has finally come to our island, now that it is summer! Today, June 23rd, is the second day this spring/summer that we have had temperatures over 20C and that is unheard of for our area... We have hardly seen the sun at all but i will NOT complain because i see there are so many areas in the world much worse off than we are!

I have not been totally lazy, tho i will admit i have not been out in the yard to do yard work since about the first of June! I have just planted my vegetable garden today and have no idea if i will get anything from it!

Anyways, in my wisdom or lack thereof, i decided to do a spreadsheet of all my unfinished or kitted stitching projects. Oh Dear!!! I have over 45 now... So, i am in the process of finishing some. I love starting new projects!!! I could care less if i finish them!! Not a good thing to do!

So, i am finishing what i am calling my "Mouse House". It is a pinkeep that is featured in the March 2009 Cross Stitch and Needlework Magazine. I have everything stitched, the pinkeep, the scissor holder and the scissor fob. Just put them together... So that this post isn't totally boring, (as i notice i have lost my few followers, and i don't blame them) i will show you what i have so far!

i haven't done too much with my art quilting journal. I have made a few designs in it and am collecting up fabrics to start on a project. It was a great class and learning experience!


We are getting pretty excited here as Prince William and his wife Kate are expected for a visit in a weeks time. They are both coming to the town i live in so i will have to decide if i want to fight traffic to see if i can catch a glimpse...


In the meantime, enjoy your summer!

Wednesday, March 30, 2011

Art Journal still in week 2


Hello!

We still have snow on the ground but if we get a few more days like today, when it got above zero Celcius it should go quickly. I hate to say it but they are calling for a 10 + cm snow storm for this saturday!! Give me a break!! It's April!


Well, I did go out for some pictures when I said I would in my post below but didn't find anything or anywhere to take photos in town. This past sunday, I went to the north shore of the island and had a whole afternoon of fun! I walked around a fishing wharf full of lobster traps and fishing pots and old anchors and hooks and had a wonderful time! The dog thought she died and went to heaven. Nothing more inviting than a fishing wharf full of fish and cat smells.


I was really lucky because the first thing I came across was some baby seals! Though we got tons of snow this past winter, our temperatures didn't get extremely cold (meaning -20 or -30 C like usual) so there wasn't much ice in the Gulf of St. Lawrence. As such, the grey seals, which usually use the pack ice to have their babies, had no where to go except on our beaches. I was lucky to find some babies on shore. The photos are cropped so don't think I got as close at it might appear!!!


This is a baby that hasn't started to turn colour yet, or hasn't lost its baby fur. It is still totally white.


This baby was starting to turn grey, with a dark strip down its back and the face had turned dark.


After taking a gazillion pictures of the seals, I got down to business on the wharf. One thing I learned about taking photos of a particular colour, when you go to a fishing village or wharf for photos of blue things, you are going to get the same colour blue. Everyone uses Marine Blue!!! So, in my photos below, i have a mussel shell, a javex bottle and a shot gun shell that washed up on the beach, some rope, a tarp, gravel/rocks, fish containers, various painted woods and a window with a cat!


I must say though, it was the most enjoyable afternoon walking around taking photos! Can't wait to do it again! Yes, I am totally behind in my class work, but that is the best part of the class; each person works at their own speed!

On to the next project!

Saturday, March 26, 2011

Studio Journal - Lesson 2 started!

Howdy!
Well, Lesson 2 has been started and WOW!!!!! What I am learning!!!

Its been a while since I've painted with watercolours so I forgot that to get a dark watercolour, you need to dip heavily into your paint. In any case, I was able to get enough out of what I did to learn something. This is the before photo. Watercoloured pages, but on the left, plastic wrap applied and left to dry and on the right, salt applied.

I was so eager to post this that I admit I did not use ideal lighting conditions when taking pictures so they aren't what they should be. In any case, this is the dried watercolour with plastic wrap removed! It leaves a wonderful design in the paint. If tried with gesso, or a moulding paste or medium, this would be very interesting!!


On the other side of the page, I used a bit too much salt on my watercolour. Added it everywhere actually instead of just a spot or two, so it is all salted looking and so I can't compare it to an unsalted portion. The salt removes some of the paint. I used sea salt, which is all I had to I think perhaps course salt would remove more paint? I will have to get some and try it! But, I always wondered how to get a sandy looking area in a painting and the salt would certainly work! This is a closeup of the salted area, but not sure it helps.


This next photo shows my most favorite project yet. Our "colour of the day" project. I had fun going thru my 200 gig of photos and finding blues. The most interesting thing I found? I take too many pictures of the same darn thing!!! Get off your butt and get some inspiration girl!!! Honest to pete! So guess what I will be doing when I get this posted! Going out with the trusty camera to see what I can capture! ( I didnt' even have these glued on yet when I took the picture!!! LOL)

Well, can't wait to get back into Lesson 2! It looks just full of projects to get into and get the brain working! Talk to you soon!

Studio Journal Class - Lesson 1 complete!

Well, as you can see, there is still alot of snow on the ground. There is still over 2 feet of snow along the back of the yard. I think they are lying to us when they say Spring is here!Well, I have been working on my Studio Journal class and am thrilled at what I am learning.
I walked around the house and did pencil rubbings of various items. I actually got over zealous and have about three pages of various rubbings! Does this say something about me psychologically because I like rubbings? LOL

And of course, the tonal scale of some of our rubbings.


And other completed parts of the lesson.

We were to take our rubbings and make an artistic interpretation with it. I should have waited til morning because I spent a few hours doing the exercises, but was eager to finish. I had a sneak preview of the next lesson and wanted so badly to start it. In any case, this was the best I could come up with.


Yippy!!! One down, 5 more to go and Lesson 2 has been started!

Sunday, March 20, 2011

Art Journals and Snow

Well, you can tell its been a while since I've posted! I went to add photos first before writing anything and ended up posting them with no comments! Wow!!! I guess its been more than a little while!

Well, the above photo shows how much snow we had about 2 1/2 to 3 weeks ago so my excuse for not posting here is that perhaps I have been in a very deep depression over the humungous amount of snow we have received this winter!!! We had over 6 to 8 feet in the backyard! Please take note of the tree branch in the above photo that is directly to the right of my husband Kevin and our dog Skyler. There is about 5 feet or more of snow on the ground right there!

Here is a photo of that same area taken about 30 minutes ago, on Mar. 20. Still alot of snow, but at least there is some bare ground showing and there is an end in sight to this horrible snowy winter!

I have been doing alot of stitching and of course have no photos of any of it. I am currently working on Quaker Diamonds by Rosewood Manor. One thing I did that excites me to no end is, I enrolled in my very first online course with Sharon B and what a wonderful thing to do! The course is called "Studio Journals" and it is amazing! I am a few weeks behind as a family emergency came up that called me away for quite a few weeks but I have jumped in today and am ready to roll!!!

I have never ever done a journal or scrapbooking or anything similar in my life. I found out about a certain book about 15 years ago that dealt with painting and decorating journal pages and was excited enough to search for years to find that book. Then along came Sharon B's website. I am totally in awe of her stitching and the information she provides on her web site. I consider her samples to be works of art!

I have been in art stores over the years and I'm sure I have a life time supply of journals in various sizes and forms lying around but have always been a bit leary of jumping in to use any of them, thinking that when I got "good enough" to put something into a journal, I would. But, reading Sharon's class notes I discovered that if I never start a journal, I will never learn, I won't get to where I want to go. My ideas will stay jumbled in my head with no where to go and no way to get to where I want them to go.

I love nature and trees and I love taking photographs. To attest to that, I have 2 - 500 gig hard drives on which I store and backup my photographs, so yes, I love taking photographs.

Anyways, this is the introductory page to my very first journal ever! I have a dream to take my photographs further and do art quilts with them, or wall hangings, or something. I just feel there is something in me that needs to do something with what I see in my photographs. The sunrise is the light shining on a new adventure, art journalling!


I can very easily get caught up in the details and so when I printed off my "I have a dream" saying for the first page, I carefully took my scissors and cut out the word "DREAM". I then thought to myself that "enough of this crap", and ripped the rest of the words out. I had alot of fun doing my first few pages!
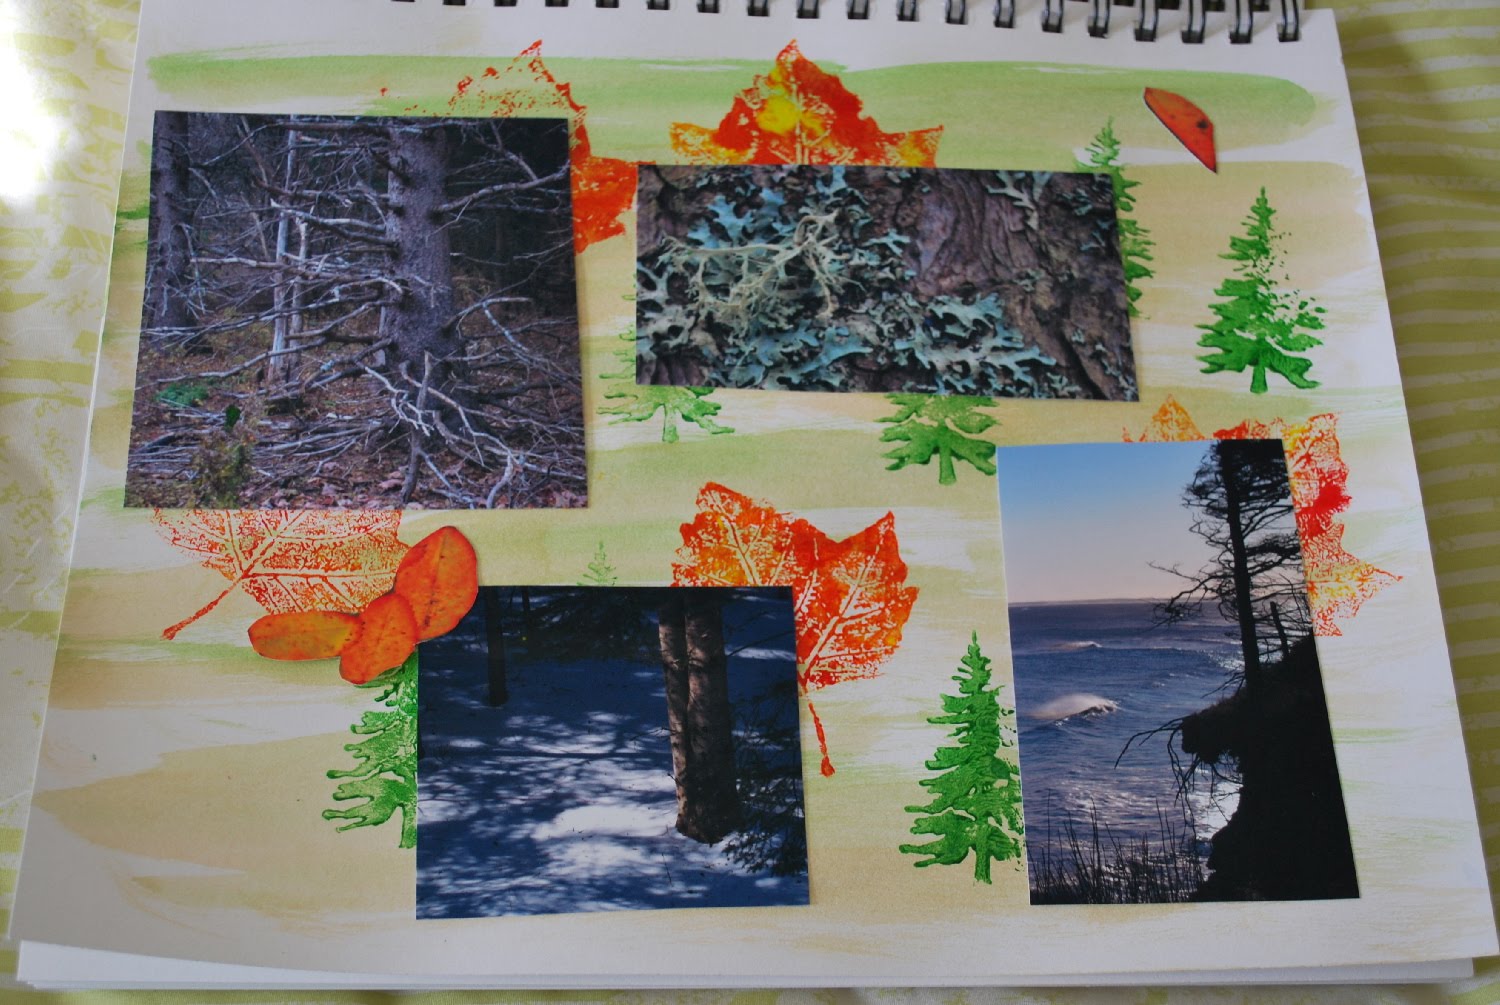
I have always loved trees and taking photographs of trees. As well, I love the play of light and dark, especially in the winter when the shadows are that wonderful shade of blue. So, the very first photos I chose for my art journal are of trees and nature and the play of shadow and light. These are what I think about when I think of making an art quilt and so I needed to get them into the journal. I will do the exercises in the class notes from Sharon though, to make sure I learn everything I need to to get to where I want to be!


Well, thank you for reading and joining me on my new adventure!